1 About ERADIS
The ERADIS is a public database of safety and interoperability documents developed and managed by the Agency. The application is available from both the Agency’s public website (www.era.europa.eu) or directly at the new WEB address: http://www.era.europa.eu/eradis. The ERADIS database ensures that the information relevant to the safety and interoperability of the railways in the Member States is accessible and transparent for all interested parties and stakeholders in the railway; therefore the consultation of the ERADIS is open to all public users.
2 Log in to ERADIS
The ERADIS users can be grouped into 3 role categories, each one is divided into several sub-categories:
· ERA Internal
An internal actor (ERA) is a user within the Agency. The types of internal actors are as follows:
o ERADIS Administrator who manages the reference data of ERADIS
o Safety Administrator who handles actively the Safety documents
o Interoperability Administrator who handles actively the Interoperability documents.
All types of internal actors need a secured access to the application by providing a login name and a password.
· ERA External:
An external actor (ERA-EXT) is a user who receives a secured access to ERADIS application by providing a login name and a password and is requested to provide Interoperability or Safety information; an external actor is known either as member of:
o A National Safety Authority (NSA)
o A National Investigation Body (NAIB)
o A Manufacturer
· Anonymous
Anonymous is a user who can access to ERADIS application without providing a login name and a password: this actor can browse and consult any published (validated) Safety and Interoperability documents
Each category, depending on the given privileges, has different access to the various application modules in which the user can handle the information, as summarised in the following table:
|
Category Module |
Anonymous |
ERA ERADIS Admin. |
ERA Safety Admin. |
ERA Interoperability Admin. |
ERA-EXT NAIB |
ERA-EXT NSA |
ERA-EXT Manufacturer |
|
Administration |
|
X |
|
|
|
|
|
|
Search & View |
X |
X |
X |
X |
X |
X |
X |
|
Safety Certificates |
|
|
X |
|
|
X |
|
|
Licences |
|
|
X |
|
|
X |
|
|
Safety Indicators |
|
|
X |
|
|
X |
|
|
Investigation Reports |
|
|
X |
|
X |
|
|
|
NSA & NIB Reports |
|
|
X |
|
|
X |
|
|
EC Verification Subsystems |
|
|
|
X |
|
X |
X |
|
EC Conformity Constituents |
|
|
|
X |
|
X |
X |
|
EC Suitability Constituents |
|
|
|
X |
|
X |
X |
|
Authorisation |
|
|
|
X |
|
X |
|
The ERADIS application is developed in a WYSIWYCP way (What You See Is What You Can Perform), that is, the current user will be able to perform only those actions that are allowed by the category he belongs to.
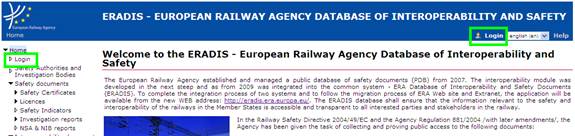
In order to access the ERADIS as ERA or ERA-EXT user, it is necessary to be logged in. Login page is accessible from the menu on the main page by clicking on the menu item or click on the icon as illustrated below:
The Login screen will be displayed:
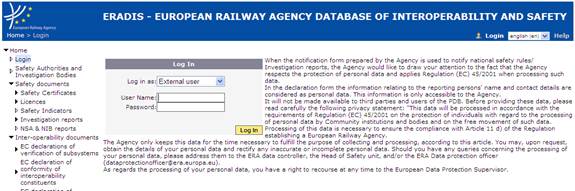
Select an item in “Log in as” list (ERA internal or ERA external), provide user name/password of a user and click on the "Log In" button.
If the user is logged in successfully, the welcome screen will be displayed:
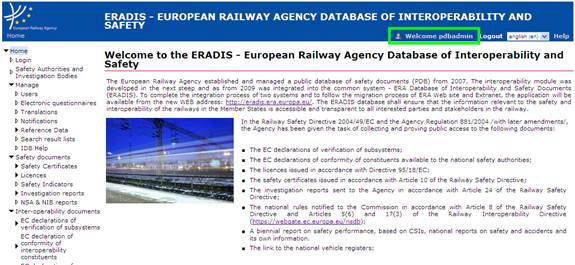
According to the role(s) of the connected user, the privileges are granted to the user in order to give access to information or functionalities reserved for advanced ERADIS users identified either as an internal user (ERA staff - ERA) or as an external user (not ERA staff - ERA-EXT).
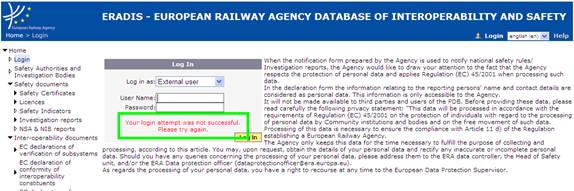
If an error occurs (from username or password, etc.), an error message will be displayed:
3 Safety Certificates A & B
|
User Category |
User Role |
Allowed Actions |
|
ERA Safety Administrator |
|
Search for certificates Submit new certificates Renew/amend/modify /revoke existing certificates Validate/invalidate/delete certificates |
|
ERA-EXT NSA |
Safety Certificates |
Search for certificates Submit new certificates Renew/amend/update/revoke existing certificates |
|
Anonymous Non-Authorised User |
|
Search for certificates |
Each submitted/renewed/amended/revoked certificate will need to pass an ERA validation first in order to become available to the public, which will only be allowed to read existing certificates that have been validated by ERA.
3.1 Safety Certificates main page
The following screenshot displays the Safety Certificates main page for the following user:
· Anonymous: user not logged to the application
· Any ERA user for which the Safety Administrator role is not granted
· Any ERA-EXT user for which the NSA-Safety Certificate role is not granted
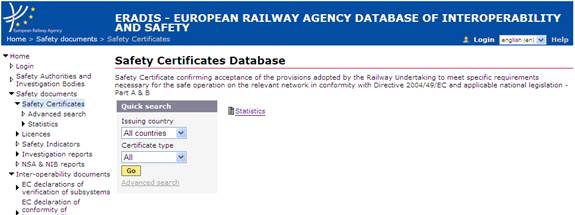
Figure 8
3.2 Searching for a certificate
3.2.1 Quick search
The quick search allows you to quickly find a certificate A and/or certificate B issued by a certain country.
On the main page (Figure 8), select an issuing country and/or a certificate type from the list.
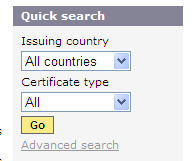
And press the ![]() button: a list will be displayed.
button: a list will be displayed.
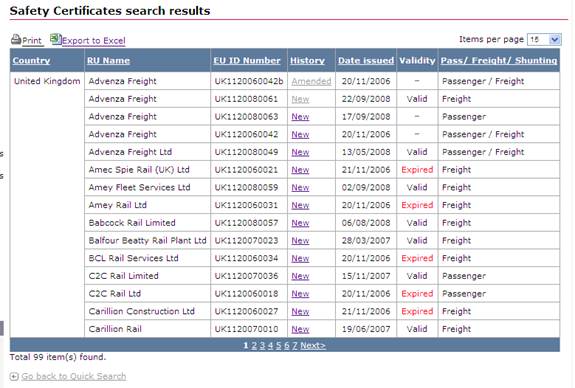
Figure 9
The search results are grouped in pages:
·
To go to a specific page, click on the
page number (![]() ) at the bottom of the
list
) at the bottom of the
list
·
To move to the next/previous page, click
on the ![]() /
/ ![]() link at the bottom of the page
link at the bottom of the page
·
To display more/less items per page,
chose the number of items in the ![]() list
at top of the list
list
at top of the list
·
To print the list, click on the ![]() link at the top of the list
link at the top of the list
·
To export the list into an Excel file,
click on the ![]() link at the top of the
list
link at the top of the
list
· To sort the list, click on the field header you want to sort by: sorting is done per group, where a group is defined first by the country and then by the RU
· To view a certificate, click on the “History” field of the certificate you want to view
According to the certificate’s type (Part A or Part B), the page will be displayed:
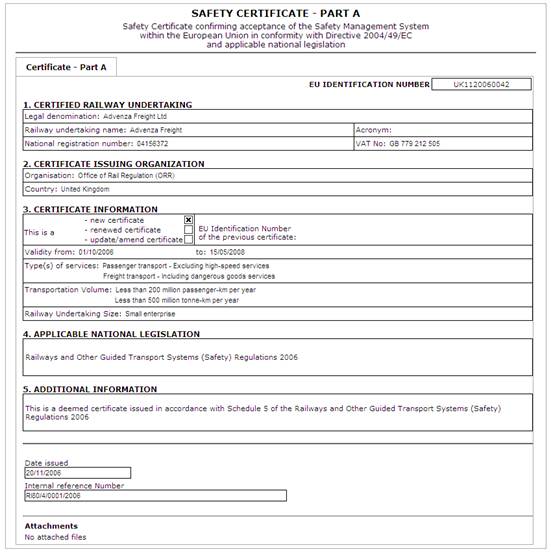
Figure 10
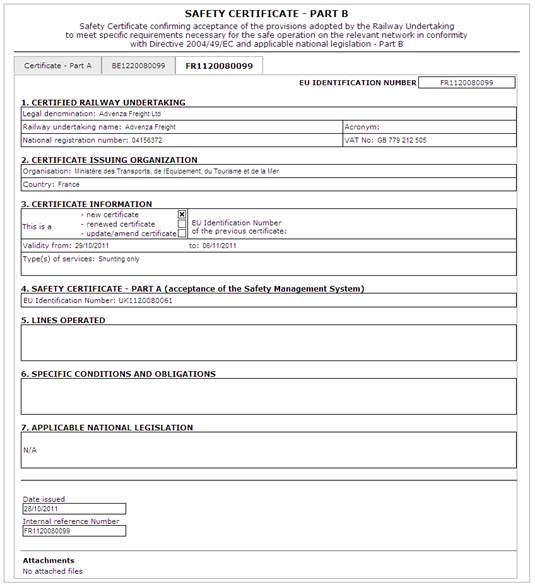
Figure 11
3.2.2 Advanced search
The advanced search allows you to find a certificate satisfying multiple criteria.
On the main page (Figure 8), click
on the ![]() link: a page will be
displayed.
link: a page will be
displayed.
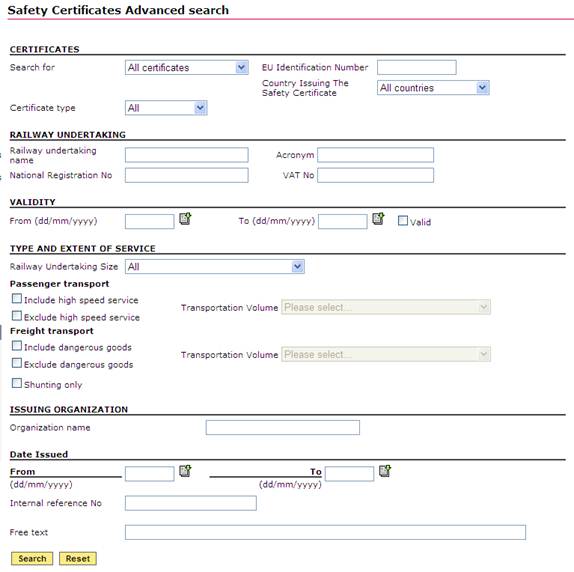
Figure 12
Fill in the search criteria and click on
the ![]() button: a list will be
displayed as shown in Figure 9.
button: a list will be
displayed as shown in Figure 9.
3.3 Print a certificate
You can print at
any time the information on the screen, by clicking on the ![]() link at the top of the page.
link at the top of the page.
3.4 Export to PDF
You can export the Certificate from view page (Figure 10 or Figure 11), by clicking on the ![]() link at the top of the page.
link at the top of the page.
3.5 Statistics
This feature allows the user to generate statistic reports on existing Safety Certificates A & B based on specific criteria.
3.5.1 Navigate through the statistic report
Once the report displayed, several navigation buttons are available on the report:
![]()
·
To go to a specific page of the report,
type a page number (![]() ) on the yellow band and
press the Enter key
) on the yellow band and
press the Enter key
·
To move to the next/previous page of the
report, click on the ![]() /
/ ![]() link on the yellow band
link on the yellow band
·
To find a string in the report, type a
text in the ![]() field and click the
field and click the ![]() link. Click on the
link. Click on the ![]() link to find the next
occurrence
link to find the next
occurrence
·
To resize the page of the report, select
a width in the ![]() list
list
·
To print the report, click on the ![]() button
button
·
To refresh the report, click on the ![]() button
button
· To sort the list, click on the arrow in field header you want to sort by
· To view a certificate, click on the value displayed in a cell
In case of a sum:
If the number equals to zero: no link to certificate available
If the number equals to one: the certificate view is displayed as show in Figure 10 (if certificate A) or Figure 11 (if certificate B)
If the number is greater than one: the list of certificates is displayed as show in Figure 9
In case of an EU Identification Number:
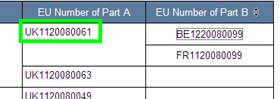
The certificate view is displayed as show in Figure 10 (if certificate A) or Figure 11 (if certificate B)
3.5.2 Export the statistic report
Once the report displayed, it is possible to export the result in several output format:
![]()
·
To export the report into a file, click
on the ![]() button and select an
available output format in the list
button and select an
available output format in the list

From the generated file (PDF, Excel, Word, MHTML), the user can view a certificate by clicking on a number displayed in a cell: see the above “To view a certificate” bullet
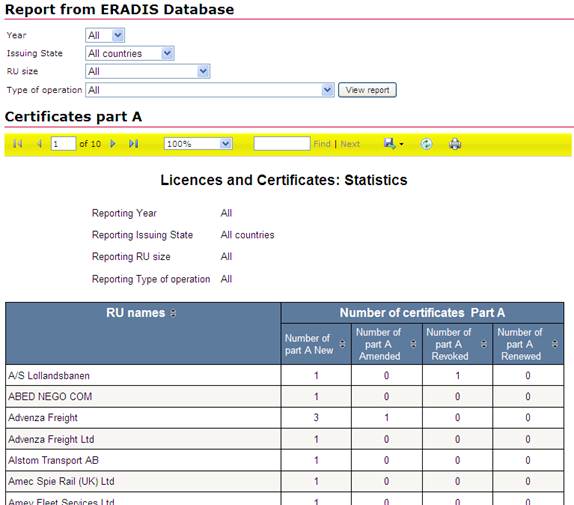
3.5.3 Statistics - Certificates A
This report displays a list of Safety Certificate A per Railway Undertaking and per certificate’s type (new, amended, revoked, renewed).
To generate the report, on the main page (Figure 8) click on the ![]() link, and click on the
link, and click on the ![]() link.
The below page is displayed:
link.
The below page is displayed:
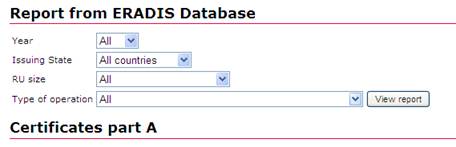
On the above page, select a year and/or an issuing state and/or a railway undertaking size and/or a type of operations from the list.
And press the ![]() button: the report will be displayed.
button: the report will be displayed.
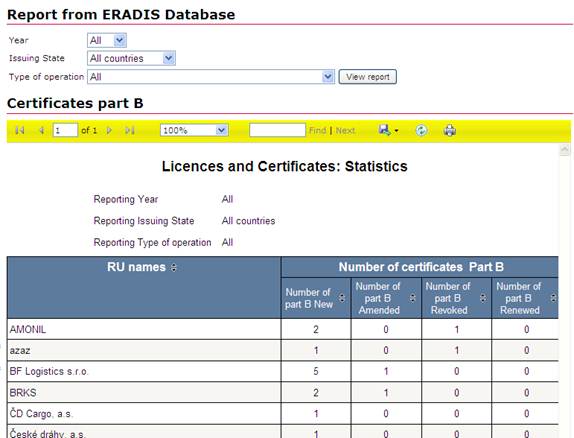
3.5.4 Statistics - Certificates B
This report displays a list of Safety Certificate B per Railway Undertaking and per certificate’s type (new, amended, revoked, renewed).
To generate the report, on the main page (Figure 8) click on the ![]() link, and click on the
link, and click on the ![]() link.
The below page is displayed:
link.
The below page is displayed:
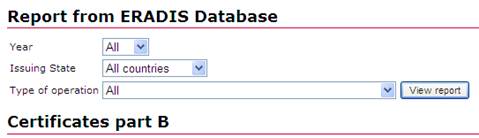
On the above page, select a year and/or an issuing state and/or a type of operations from the list.
And press the ![]() button: the report will be displayed.
button: the report will be displayed.
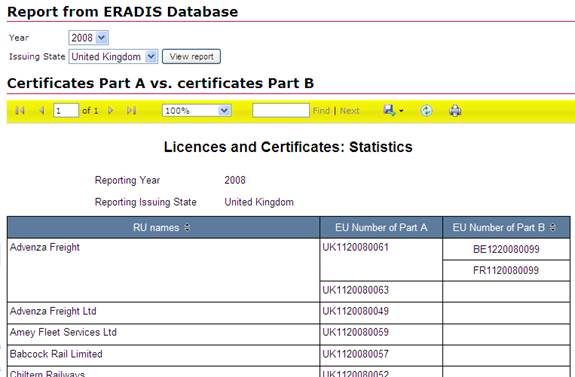
3.5.5 Statistics - Certificates A versus Certificates B
This report displays a list of Safety Certificates B per Safety Certificate A and per Railway Undertaking.
To generate the report, on the main page (Figure 8) click on the ![]() link, and click on the
link, and click on the ![]() link.
The below page is displayed:
link.
The below page is displayed:

On the above page, select a year and/or an issuing state from the list.
And press the ![]() button: the report will be displayed.
button: the report will be displayed.
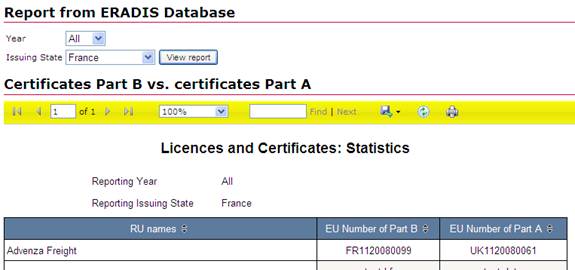
3.5.6 Statistics - Certificates B versus Certificates A
This report displays a list of Safety Certificates A per Safety Certificate B and per Railway Undertaking.
To generate the report, on the main page (Figure 8) click on the ![]() link, and click on the
link, and click on the ![]() link.
The below page is displayed:
link.
The below page is displayed:
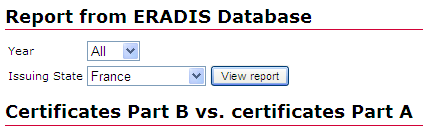
On the above page, select a year and/or an issuing state from the list.
And press the ![]() button: the report will be displayed.
button: the report will be displayed.
4 Licences
|
User Category |
User Role |
Allowed Actions |
|
ERA Safety Administrator |
|
Search for licences Submit new licences Suspend/amend/modify/revoke existing licences Validate/invalidate/delete licences |
|
ERA-EXT NSA |
Licences |
Search for licences Submit new licences Suspend/amend/modify/revoke existing licences |
|
Anonymous Non-Authorised User |
|
Search for licences |
Each submitted/suspended/amended/revoked licence will need to pass an ERA validation first in order to become available to the public, which will only be allowed to read existing licences that have been validated by ERA.
It is important to note that one licence is related to a specific Railway Undertaking (RU).
4.1 Licences main page
The following screenshot displays the Licence main page for the following users:
· Anonymous: user not logged to the application
· Any ERA user for which the Safety Administrator role is not granted
· Any ERA-EXT user for which the NSA-Safety Licence role is not granted
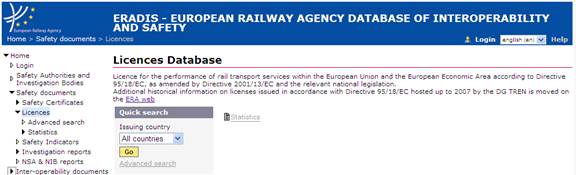
Figure 18
4.2 Searching for a certificate
4.2.1 Quick search
The quick search allows you to quickly find a licence issued by a certain country.
On the main page (Figure 18), select an issuing country from the list.
And press the ![]() button: a list will be displayed.
button: a list will be displayed.
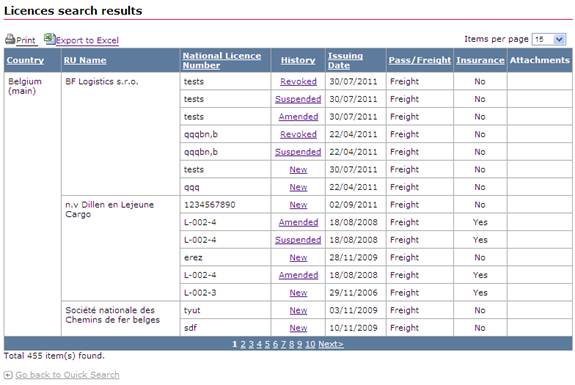
Figure 19
The search results are grouped in pages:
·
To go to a specific page, click on the
page number (![]() ) at the bottom of the
list
) at the bottom of the
list
·
To move to the next/previous page, click
on the ![]() /
/ ![]() link at the bottom of the page
link at the bottom of the page
·
To display more/less items per page,
chose the number of items in the ![]() list
at top of the list
list
at top of the list
·
To print the list, click on the ![]() link at the top of the list
link at the top of the list
·
To export the list into an Excel file,
click on the ![]() link at the top of the
list
link at the top of the
list
· To sort the list, click on the field header you want to sort by: sorting is done per group, where a group is defined first by the country and then by the RU
· To view a licence, click on the “History” field of the licence you want to view
· To open an attachment, click on the attachment’s name
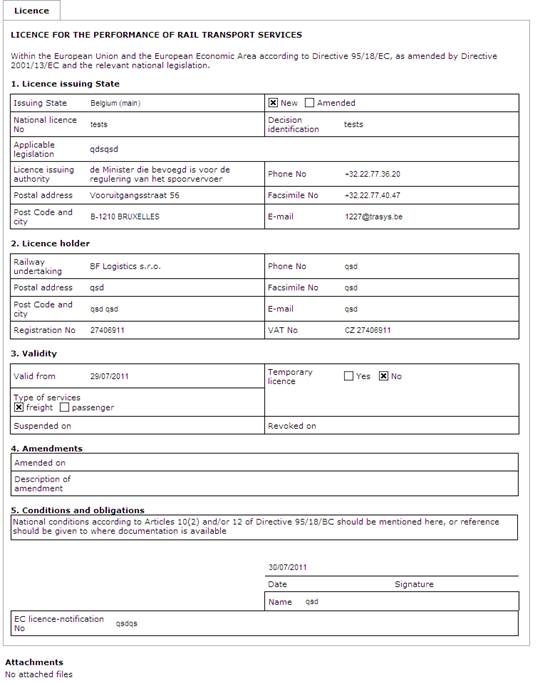
Figure 20
4.2.2 Advanced search
The advanced search allows you to find a certificate satisfying multiple criteria.
On the main page (Figure 18), click on the ![]() link: a page will be displayed.
link: a page will be displayed.
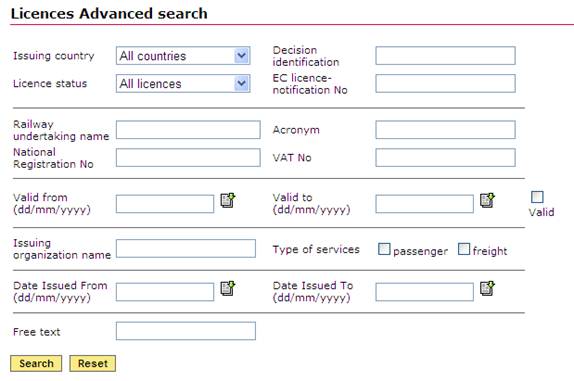
Figure 21
Fill in the search criteria and click on
the ![]() button: a list will be
displayed as shown in Figure 19.
button: a list will be
displayed as shown in Figure 19.
4.3 Print a licence
You can print at any time the information
on the screen, by clicking on the ![]() link
at the top of the page.
link
at the top of the page.
4.4 Export to PDF
You can export the licence from view page (Figure 20), by clicking on the ![]() link at the top of the page.
link at the top of the page.
4.5 Statistics
This feature allows the user to generate a statistic report on existing licences based on specific criteria.
4.5.1 Navigate through the statistic report
Once the report displayed, several navigation buttons are available on the report:
![]()
·
To go to a specific page of the report,
type a page number (![]() ) on the yellow band and
press the Enter key
) on the yellow band and
press the Enter key
·
To move to the next/previous page of the
report, click on the ![]() /
/ ![]() link on the yellow band
link on the yellow band
·
To find a string in the report, type a
text in the ![]() field and click the
field and click the ![]() link. Click on the
link. Click on the ![]() link to find the next
occurrence
link to find the next
occurrence
·
To resize the page of the report, select
a width in the ![]() list
list
·
To print the report, click on the ![]() button
button
·
To refresh the report, click on the ![]() button
button
· To sort the list, click on the arrow in field header you want to sort by
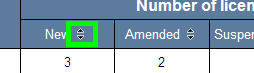
· To view a licence, click on the value displayed in a cell
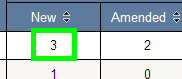
If the number equals to zero: no link to certificate available
If the number equals to one: the certificate view is displayed as show in Figure 20
If the number is greater than one: the list of certificates is displayed as show in Figure 19
4.5.2 Export the statistic report
Once the report displayed, it is possible to export the result in several output format:
![]()
·
To export the report into a file, click
on the ![]() button and select an
available output format in the list
button and select an
available output format in the list
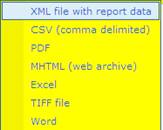
From the generated file (PDF, Excel, Word, MHTML), the user can view a licence by clicking on a number displayed in a cell: see the above “To view a licence” bullet
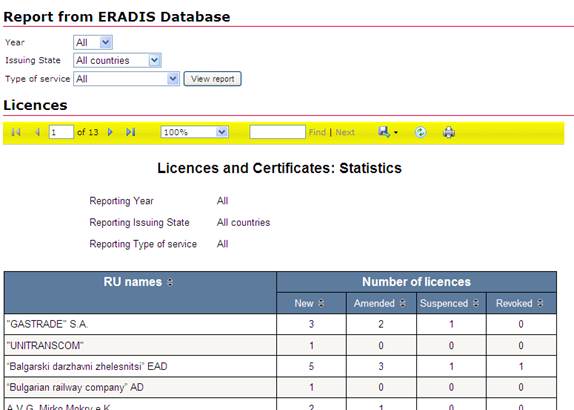
4.5.3 Generating Statistics on Licences
This report displays a list of Licences per Railway Undertaking and per licence’s type (new, amended, revoked, suspended).
To generate the report, on the main page (Figure 18) click on the ![]() link, and click on the
link, and click on the ![]() link.
The below page is displayed:
link.
The below page is displayed:

On the above page, select a year and/or an issuing state and/or a type of services from the list.
And press the ![]() button: the report will be displayed.
button: the report will be displayed.
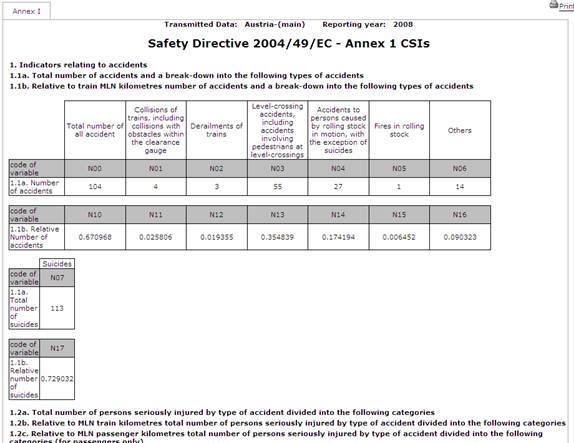
5 Common Safety Indicators Report (CSI)
|
User Category |
User Role |
Allowed Actions |
|
ERA Safety Administrator |
|
Search for CSI Submit new CSI Validate/invalidate CSI |
|
ERA-EXT NSA |
CSI |
Search for CSI Submit new CSI |
|
Anonymous Non-Authorised User |
|
Search for CSI |
Each submitted Common Safety Indicators will need to pass an ERA validation first in order to become available to the public, which will only be allowed to read existing CSI report that have been validated by ERA.
5.1 CSI report main page
The following screenshot displays the CSI report main page for the following users:
· Anonymous: user not logged to the application
· Any ERA user for which the Safety Administrator role is not granted
· Any ERA-EXT user for which the NSA-Safety CSI role is not granted
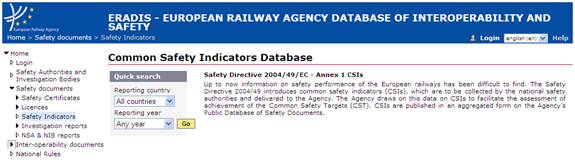
Figure 26
5.2 Searching for CSI report
5.2.1 Quick search
The quick search allows you to quickly find a CSI report issued by a certain reporting country and/or in a certain reporting year
On the main page (Figure 26), select a reporting country and/or a reporting year from the lists.
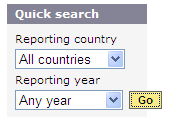
And press the ![]() button: a list will be displayed.
button: a list will be displayed.
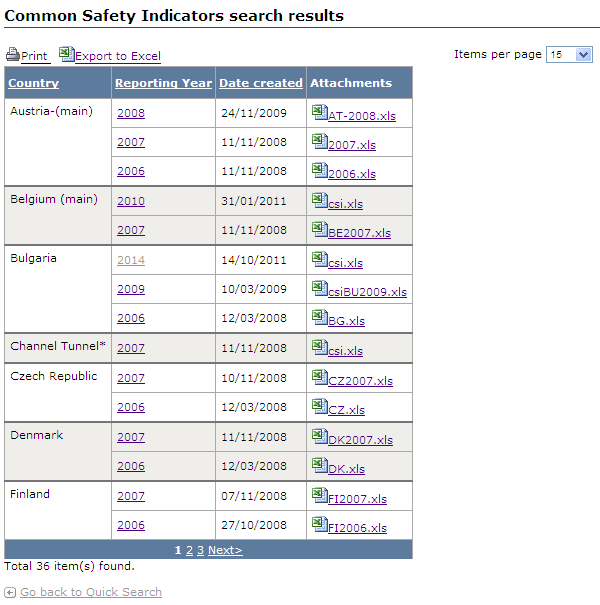
Figure 27
The search results are grouped in pages:
·
To go to a specific page, click on the
page number (![]() ) at the bottom of the
list
) at the bottom of the
list
·
To move to the next/previous page, click
on the ![]() /
/ ![]() link at the bottom of the page
link at the bottom of the page
·
To display more/less items per page,
chose the number of items in the ![]() list
at top of the list
list
at top of the list
·
To print the list, click on the ![]() link at the top of the list
link at the top of the list
·
To export the list into an Excel file,
click on the ![]() link at the top of the
list
link at the top of the
list
· To sort the list, click on the field header you want to sort by: sorting is done per group, where a group is defined first by the country
· To view a CSI report, click on the “Reporting year” field of the CSI report you want to view
· To open a submitted CSI report electronic form attachment, click on the attachment’s name
By clicking on the Reporting Year, the report will be displayed on the page:
…
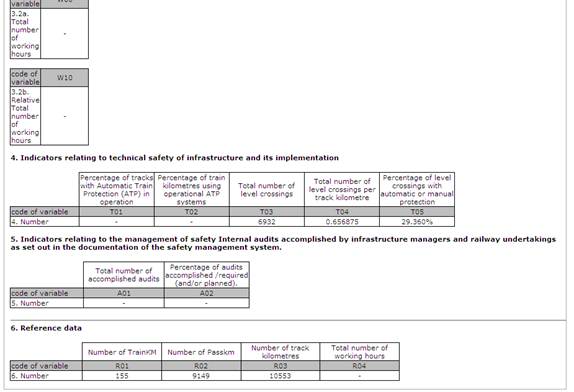
Figure 28
5.3 Print a CSI report
You can print at any time the information
on the screen, by clicking on the ![]() link
at the top of the page.
link
at the top of the page.
6 Investigation Reports
|
User Category |
User Role |
Allowed Actions |
|
ERA Safety Administrator |
|
Search for investigation reports Submit new investigation reports Modify investigation reports Validate/invalidate/delete investigation reports |
|
ERA-EXT NAIB |
NAIB |
Search for investigation reports Submit new investigation reports |
|
Anonymous Non-Authorised User |
|
Search for investigation reports |
6.1 Investigation Reports main page
The following screenshot displays the Investigation Reports main page for the following users:
· Anonymous: user not logged to the application
· Any ERA user for which the Safety Administrator role is not granted
· Any ERA-EXT user for which the NAIB role is not granted
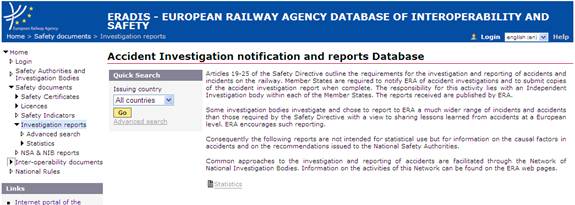
Figure 36
6.2 Searching for a notification/report
6.2.1 Quick search
The quick search allows you to quickly find a notification and/or a report issued by a certain country.
On the main page (Figure 36), select an issuing country from the list.
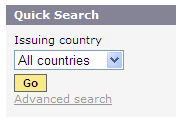
And press the ![]() button: a list will be displayed.
button: a list will be displayed.
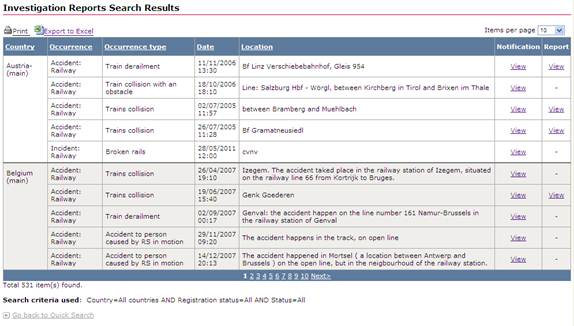
Figure 37
The search results are grouped in pages:
·
To go to a specific page, click on the
page number (![]() ) at the bottom of the
list
) at the bottom of the
list
·
To move to the next/previous page, click
on the ![]() /
/ ![]() link at the bottom of the page
link at the bottom of the page
·
To display more/less items per page,
chose the number of items in the ![]() list
at top of the list
list
at top of the list
·
To print the list, click on the ![]() link at the top of the list
link at the top of the list
·
To export the list into an Excel file,
click on the ![]() link at the top of the
list
link at the top of the
list
· To sort the list, click on the field header you want to sort by: sorting is done per group, where a group is defined first by the country
· To view a notification, click on the “Notification” field of the notification you want to view

Figure 38
· To view a report, click on the “Report” field of the investigation report you want to view
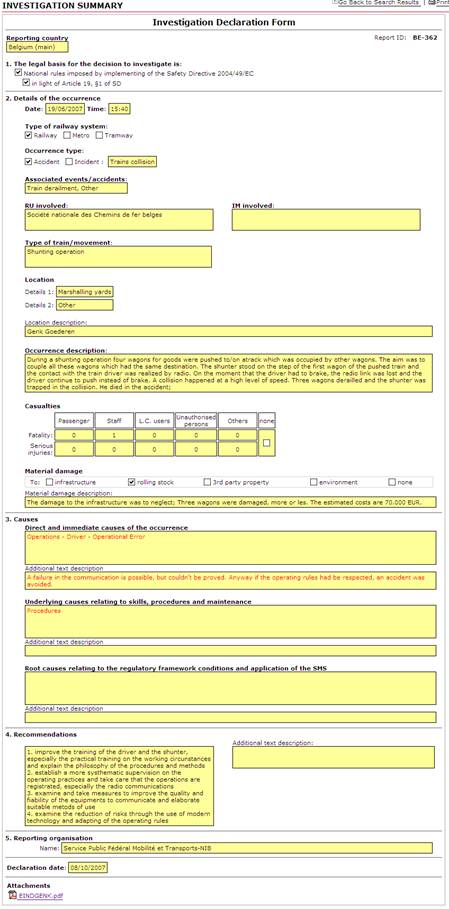
Figure 39
6.2.2 Advanced search
The advanced search allows you to find a notification and/or a report satisfying multiple criteria.
On the main page (Figure 36), click on the ![]() link: a page will be displayed.
link: a page will be displayed.
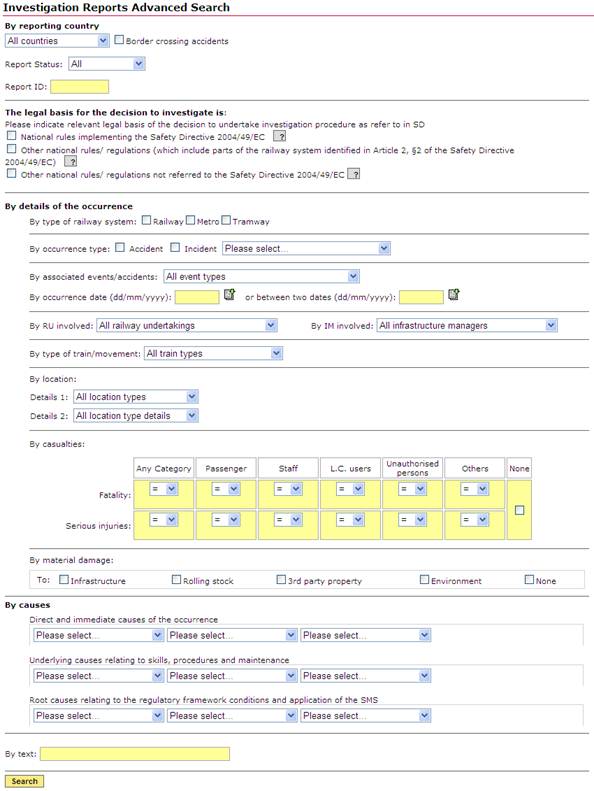
Fill in the search criteria and click on
the ![]() button: a list will be
displayed as shown in Figure 37.
button: a list will be
displayed as shown in Figure 37.
6.3 Print a notification/report
You can print at any time the information
on the screen, by clicking on the ![]() link
at the top of the page.
link
at the top of the page.
6.4 Statistics
This feature allows the user to generate a statistic report on existing investigation notifications based on specific criteria.
6.4.1 Navigate through the statistic report
Once the report displayed, several navigation buttons are available on the report:
![]()
·
To go to a specific page of the report,
type a page number (![]() ) on the yellow band and
press the Enter key
) on the yellow band and
press the Enter key
·
To move to the next/previous page of the
report, click on the ![]() /
/ ![]() link on the yellow band
link on the yellow band
·
To find a string in the report, type a
text in the ![]() field and click the
field and click the ![]() link. Click on the
link. Click on the ![]() link to find the next
occurrence
link to find the next
occurrence
·
To resize the page of the report, select
a width in the ![]() list
list
·
To print the report, click on the ![]() button
button
·
To refresh the report, click on the ![]() button
button
· To view a notification, click on the value displayed in a cell
If the number equals to zero: no link to notification available
If the number equals to one: the notification view is displayed as show in Figure 38
If the number is greater than one: the list of notifications is displayed as show in Figure 37
6.4.2 Export the statistic report
Once the report displayed, it is possible to export the result in several output format:
![]()
·
To export the report into a file, click
on the ![]() button and select an
available output format in the list
button and select an
available output format in the list

From the generated file (PDF, Excel, Word, MHTML), the user can view a notification by clicking on a number displayed in a cell: see the above “To view a notification” bullet
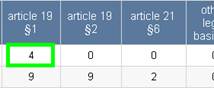
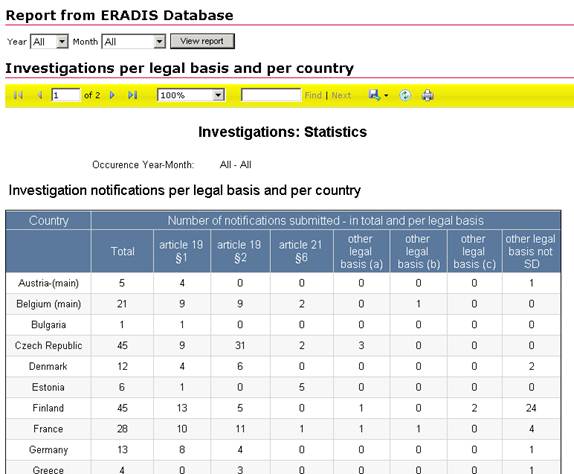
6.4.3 Generating Statistics on Investigations per legal basis and per country
This report counts a number of notifications per country based on specific period.
To generate the report, on the main page (Figure 36) click on the ![]() link, and click on the
link, and click on the ![]() link.
The below page is displayed:
link.
The below page is displayed:
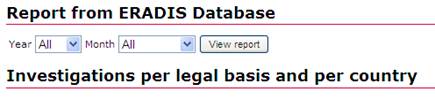
On the above page, select a year and/or a month from the list.
And press the ![]() button: the report will be displayed.
button: the report will be displayed.
7 NSA & NIB Reports
|
User Category |
User Role |
Allowed Actions |
|
ERA Safety Administrator |
|
Search for NSA & NIB reports Submit new NSA & NIB reports Validate/invalidate/delete NSA & NIB reports |
|
ERA-EXT NSA |
Annual Reports |
Search for NSA & NIB reports Submit new NSA & NIB reports |
|
Anonymous Non-Authorised User |
|
Search for NSA & NIB reports |
7.1 NSA & NIB Reports main page
The following screenshot displays the NSA & NIB Reports main page for the following users:
· Anonymous: user not logged to the application
· Any ERA user for which the Safety Administrator role is not granted
· Any ERA-EXT user for which the NSA-Annual Report role is not granted
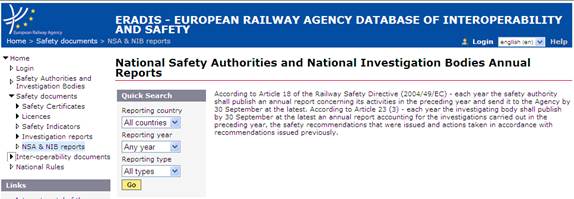
Figure 46
7.2 Searching for report
7.2.1 Quick search
The quick search allows you to quickly find a report issued by a certain country and/or in a certain year and/or in a certain reporting type.
On the main page (Figure 46), select an issuing country and/or a reporting year and/or a reporting type from the lists.
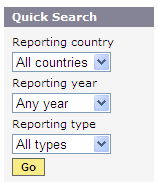
And press the ![]() button: a list will be displayed.
button: a list will be displayed.

Figure 47
The search results are grouped in pages:
·
To go to a specific page, click on the
page number (![]() ) at the bottom of the
list
) at the bottom of the
list
·
To move to the next/previous page, click
on the ![]() /
/ ![]() link at the bottom of the page
link at the bottom of the page
·
To display more/less items per page,
chose the number of items in the ![]() list
at top of the list
list
at top of the list
·
To print the list, click on the ![]() link at the top of the list
link at the top of the list
·
To export the list into an Excel file,
click on the ![]() link at the top of the
list
link at the top of the
list
· To sort the list, click on the field header you want to sort by: sorting is done per group, where a group is defined first by the country
· To open an attached NSA report electronic file, click on a language code link next to “Report” text (under the “NSA” column) for the file you want to open
· To open an attached CSI report electronic file, click on a language code link next to “CSI” text (under the “NSA” column) for the report you want to open. Note that if no CSI report electronic file is attached, the “CSI” link is enabled and redirects to the CSI main page (Figure 22)
· To view a NSA note, click on the “Note” link (under the “NSA” column) for the note you want to view
· To open an attached NIB report electronic file, click on a language code link next to “Report” text (under the “NIB” column) for the file you want to open
· To view a NIB note, click on the “Note” link (under the “NIB” column) for the note you want to view